Ceramic tile is water-resistant, making it ideal for restroom floors. However, ceramic presents cleaning challenges because of the two very different surfaces at play: the tile and the grout.
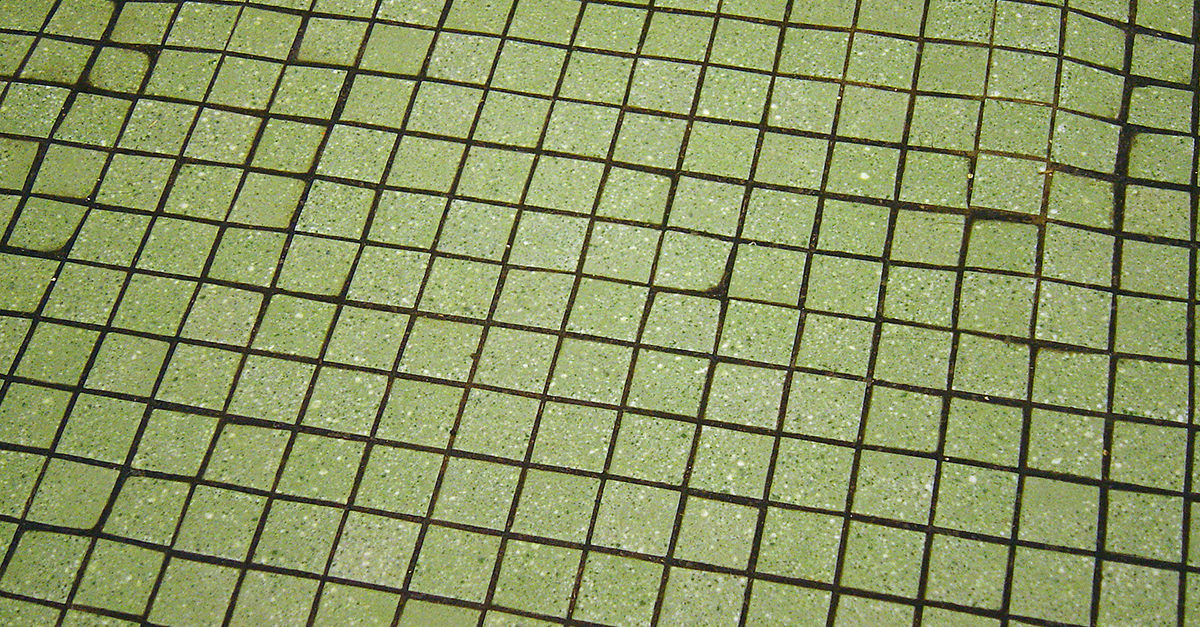
Ceramic tile floors are made up of a smooth surface surrounded by a recessed porous surface of grout (sanded being most common). Liquids poured or spilled on these floors will collect soil and travel to the lowest point, which is usually the grout lines.
As the liquid evaporates, the soil remains in the porous body of the grout. Gradually, the grout becomes darker due to this soil accumulation. Although routine cleaning methods can reduce soil accumulation, once the floor has reached soil overload you will need to perform restorative maintenance.
Restore your floor one step at a time
The first step of the restorative process is to identify the source of the soil, which is often biological or organic matter as well as residue from cleaning agents. Although ceramic tile floors generally do not require floor finish, workers often apply it as a protective barrier for the grout. Residual soil can become encapsulated in the finish during periodic maintenance processes, making the finish unsightly.
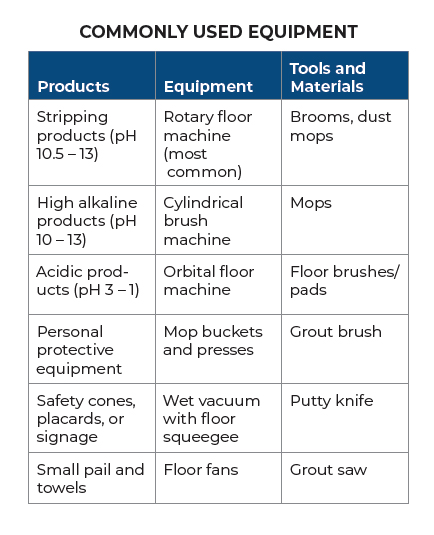
Once you have determined whether there is finish on the floor and identified the type and amount of soil, assemble the equipment, tools, and materials required to complete the job. Prepare the area for service: inspect the floor, set a safety perimeter, remove obstacles, set up step-off mats and soaking towels, ensure proper ventilation, and assemble equipment in order of use. Check out the chart below for commonly used products, tools, and equipment.
First you will need to remove the floor finish to expose the tile and grout. Follow the steps below:
- Mix stripping products in accordance with the manufacturers’ recommended dilution ratio and apply a liberal amount of solution to the floor
- Allow the solution to dwell, but do not allow it to dry
- Agitate the stripping solution with a floor machine that uses an aggressive stripping brush (brushes are much more effective on tile and grout than pads)
- Remove contaminated stripping solution with a wet vacuum and rinse the floor to remove stripping slurry residue
- Detail all edges, corners, and the cove base to remove remaining floor finish in those areas.
Although some floor finish may remain deep in the grout pores, this process will remove most of it.
If there is no floor finish, you can use a high-alkaline, general-purpose cleaner or degreaser in the same manner as the stripping solution to remove the accumulated soil on the floor and in the grout lines. You can also use this process after you’ve stripped the floor to remove any residual floor finish. Follow the same process of application, agitation, and evacuation. At this point you will have removed most of the finish and soil, however, some stubborn soil may still be deeply embedded in the grout lines.
Try these techniques for stubborn soils
You cannot remove soil recessed in grout line pores with a brush or vacuum. Instead, you must destabilize the grout using an acidic cleaning solution. Mix the solution according to manufacturers’ recommended dilution ratios then apply a liberal amount to the floor. Allow for dwell time then scrub the grout with brushes using aggressive agitating motions. The reaction between the acid and the grout will remove a small amount of grout from the surface as well as the soil embedded in it. Rinse the floor thoroughly to eliminate all cleaning solution residue.
Remove any soil remaining in corners, edges, cove bases, around partitions, and in areas below urinals with hand tools. When detailing, start with the least aggressive process and move to the
most aggressive.
Use a stiff-bristled, V-shaped grout brush in the direction of the grout line first. If soil persists, try removing it with a putty knife or razor scrapper. When all else fails, lightly abrade the grout line with the grout saw (a small handheld tool with carbide blades). If you cannot remove the soil because it is too deeply embedded in the grout or there is minimal grout left to work on, you’ll have to reapply the grout.
Keep up with regular ceramic tile floor care
Once you have thoroughly cleaned the floor, you may apply a penetrating sealer or impregnator to protect the grout. There are two processes for sealing the grout lines: applying the sealer or impregnator directly in the grout lines only, which can be time-consuming, or applying the product to the entire surface. For the second method, allow the product to penetrate the grout, then wipe off the excess sealer with toweling. It is very important to remove all the sealer and not allow it to dry on the tile.
As this restoration process involves high-alkaline stripping and degreasing products (pH 10 – 13) to remove finish and greasy and oily soil as well as acidic products (pH 3 – 1) to destabilize the grout for cleaning with grout brush or grout saw, it should only be performed by trained personnel. Make sure to follow product safety directions and wear proper personal protective equipment (PPE) when handling these products.
To keep your floor in top condition, don’t neglect your daily wet mopping routine. Make sure to damp mop afterward to remove as much solution as possible. Add a periodic scrub and rinse with brushes, followed by wet vacuuming and damp mopping, to your floor care routine. Or utilize a pressurized floor tool or spinning tool along with a hot water extractor to jet the soil out of the grout lines while extracting it from the floor at the same time. By performing routine and periodic maintenance correctly, you will considerably extend the amount of time between restorative processes.
WEBINAR: Grout Doubts and Odor Obstacles
Watch CMM’s 2019 Restroom Care Webinar, “Grout Doubts and Odor Obstacles,” co-presented by Stan Hulin and sponsored by Kaivac, Tork, and WizKid, to learn how to clean grout so it looks new again while tackling tough restroom odors that are offensive to facility users.